Sign Git commits with SSH
Git version 2.34 and later supports signing commits and tags with SSH keys — no GPG key needed.
This means you can use the 1Password SSH integration to create new Git signing keys in seconds, and use them with your terminal apps and other Git clients without the private key ever leaving 1Password. You can also automatically configure Git commit signing with SSH in the 1Password app.
When you sign your commits, they can be cryptographically verified using the SSH public keys associated with your GitHub , GitLab , or Bitbucket account. This ensures other people can verify that the changes were actually made by you. This is important because anyone with push rights to your repository can push new commits as any author, allowing them to impersonate others if commits aren't signed.
Learn how easy it is to use 1Password to sign your Git commits.
Requirements
Before you get started, you'll need to:
- Sign up for 1Password.
- Install and sign in to 1Password for Mac, Windows, or Linux.
- Update to Git 2.34.0 or later.
- Import or generate SSH keys in 1Password.
- Set up the 1Password SSH Agent.
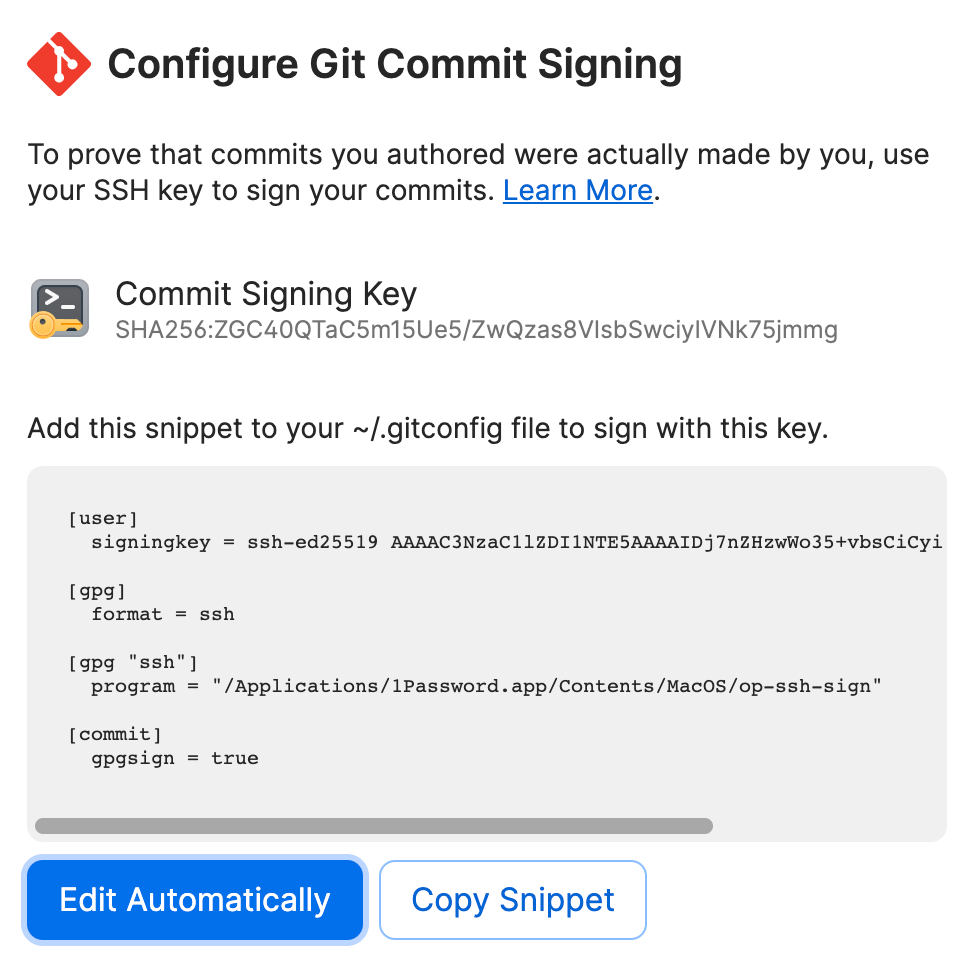
Step 1: Configure Git commit signing with SSH
To automatically configure Git commit signing with SSH globally:
- Open the SSH key you want to use in your 1Password desktop app.
- Select > Configure Commit Signing.
- In the next window, select Edit Automatically.
Or select Copy Snippet, then paste the snippet into your~/.gitconfigfile manually.
You can also configure SSH signing in a single repository.
1Password will make the following changes to your Git config file:
- Set
gpg.formattossh. - Set
user.signingkeyto the public key you chose to sign commits with. - Set
commit.gpgsigntotrueso you don't need to include the-Sflag with each commit. (optional) - Set
gpg.ssh.programto the SSH signer binary provided by 1Password, so you don't have to setSSH_AUTH_SOCKyourself. (optional)
If you use WSL on a Windows machine, learn how to set up the 1Password WSL integration to authenticate SSH and Git commands and sign your Git commits within WSL.
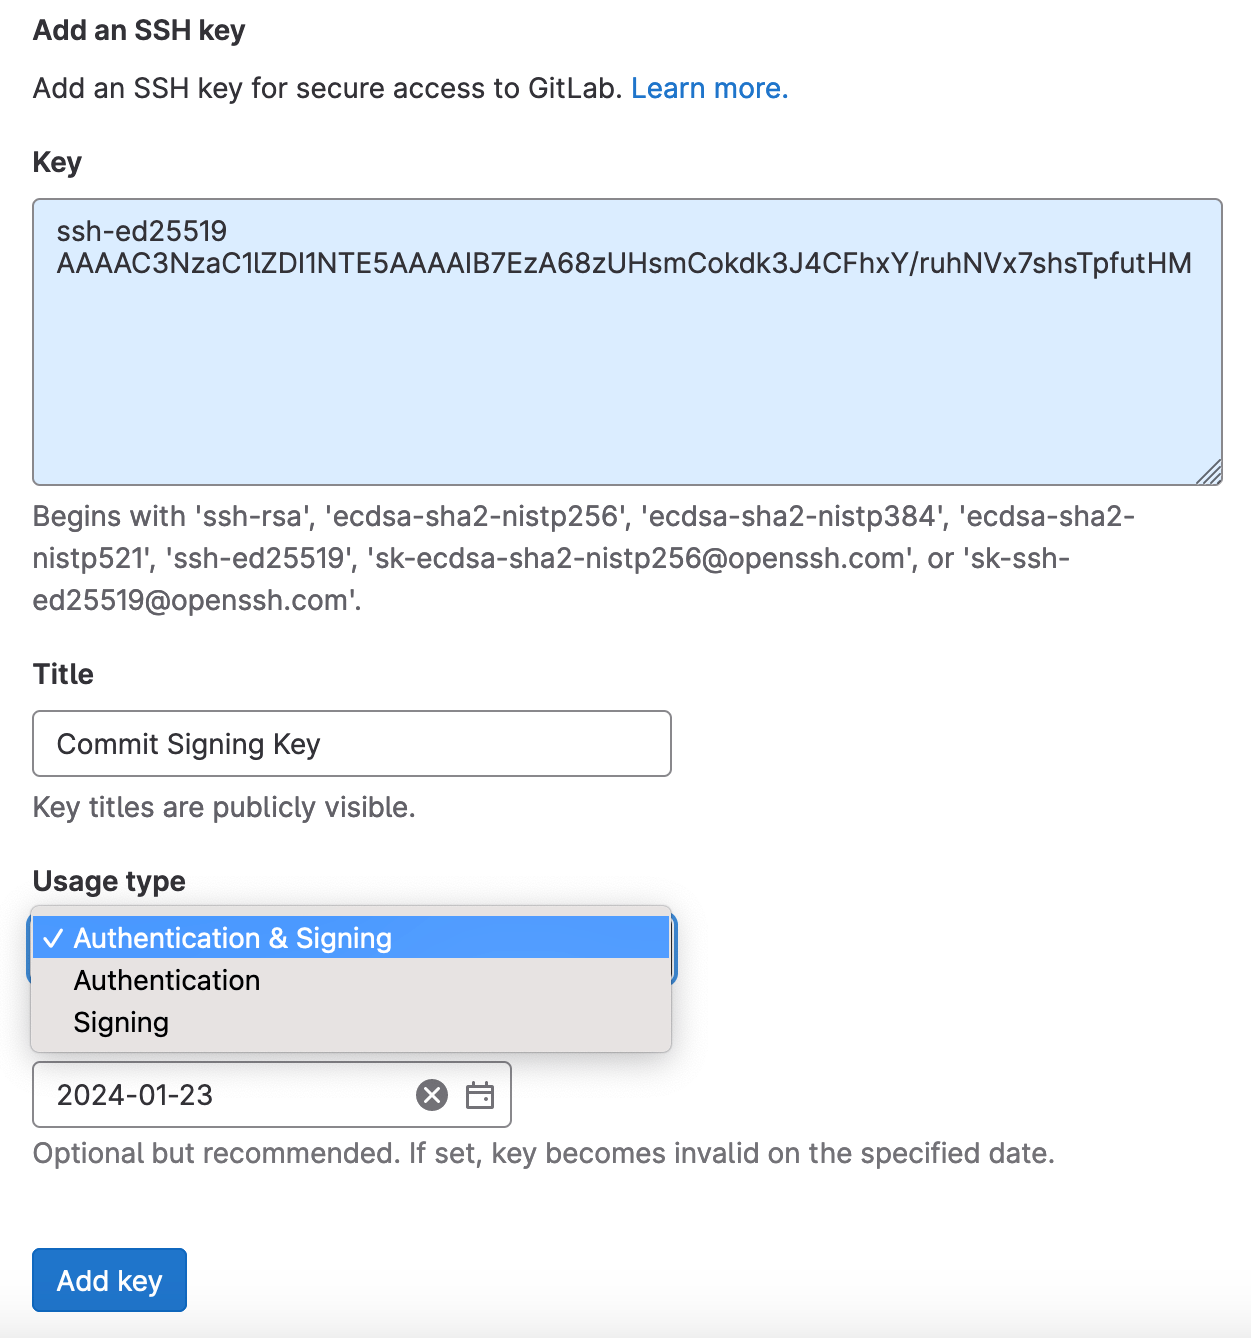
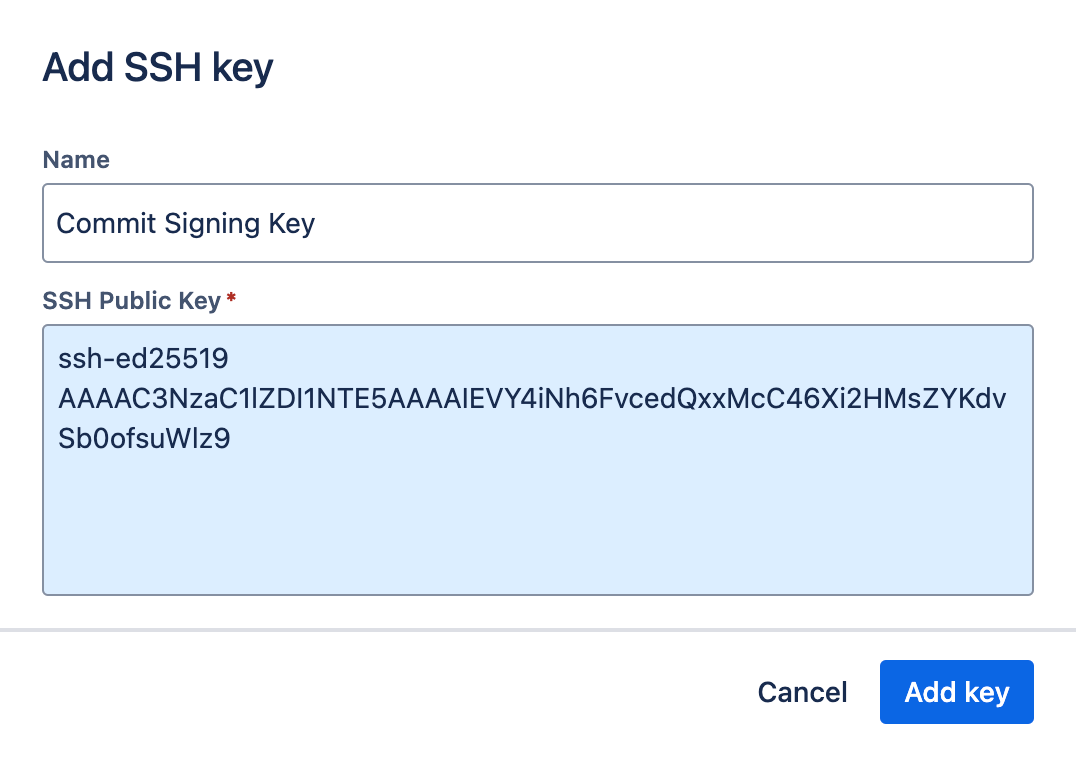
Step 2: Register your public key
Now that you've configured SSH commit signing locally, you'll need to register your public key so that others can verify the authenticity of your commits.
- GitHub
- GitLab
- Bitbucket
- Locally
To allow GitHub to verify your commits, visit the GitHub SSH key settings to register your SSH key for commit signing. You can use the 1Password browser extension to automatically fill in the public key and key title.
Make sure you set the "Key type" to Signing key to allow your SSH key to be used for signing commits.
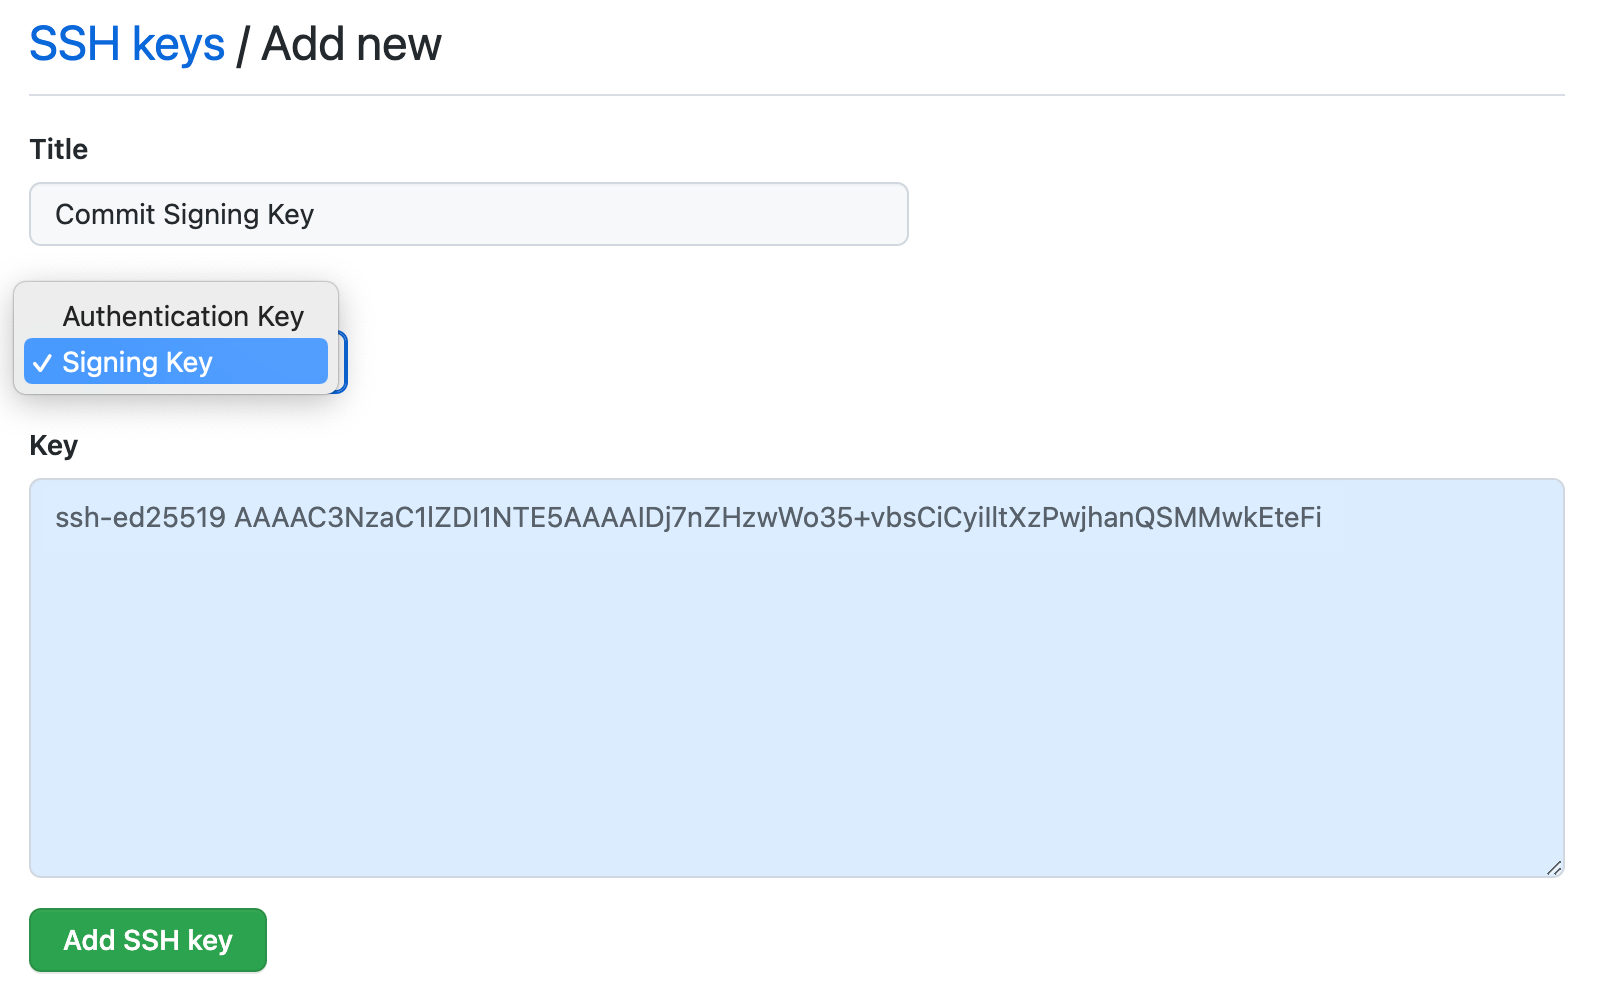
To allow GitLab to verify your commits, visit the GitLab SSH key settings to register your SSH key for commit signing. You can use the 1Password browser extension to automatically fill in the public key and key title.
Make sure you set the "Usage type" to either Authentication & Signing or Signing to allow your SSH key to be used for signing commits.
To allow Bitbucket to verify your commits, visit the Bitbucket SSH key settings to register your SSH key for commit signing. You can use the 1Password browser extension to automatically fill in the public key and key title.
To verify SSH signatures locally, you'll need to create an allowed signers file and configure Git to use it.
You can choose to configure this globally, for example:
Or to tie it to a single repository, for example:
In the allowed signers file, add pairs of emails and public keys you'd like to trust:
allowed_signers
You can share this file with others and could even consider checking it into Git, similar to a CODEOWNERS file.
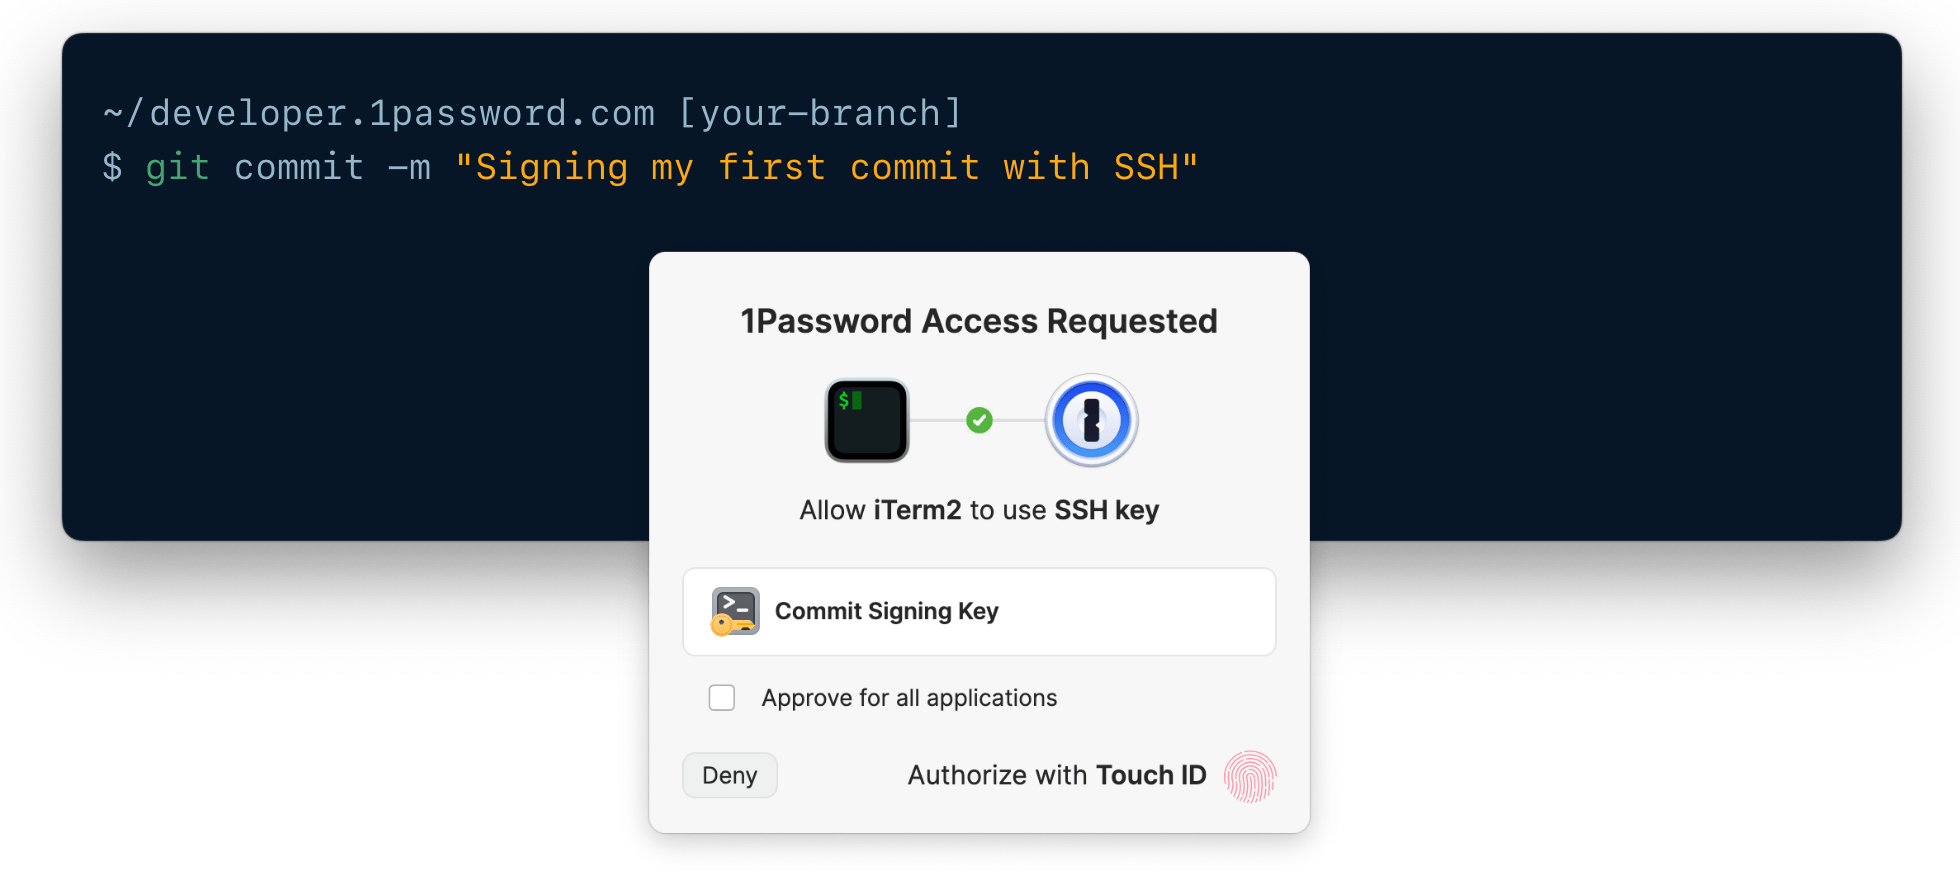
Step 3: Commit and push your code
Now that you're all set up, you can commit some code:
You'll be prompted to authorize your SSH key the same way you unlock the 1Password app (for example, with Touch ID or Windows Hello).
If you've chosen to use the same key to sign as you do to push and pull, you can now also push without requiring additional authorization:
Step 4: Verify your commit signature
- GitHub
- GitLab
- Bitbucket
- Locally
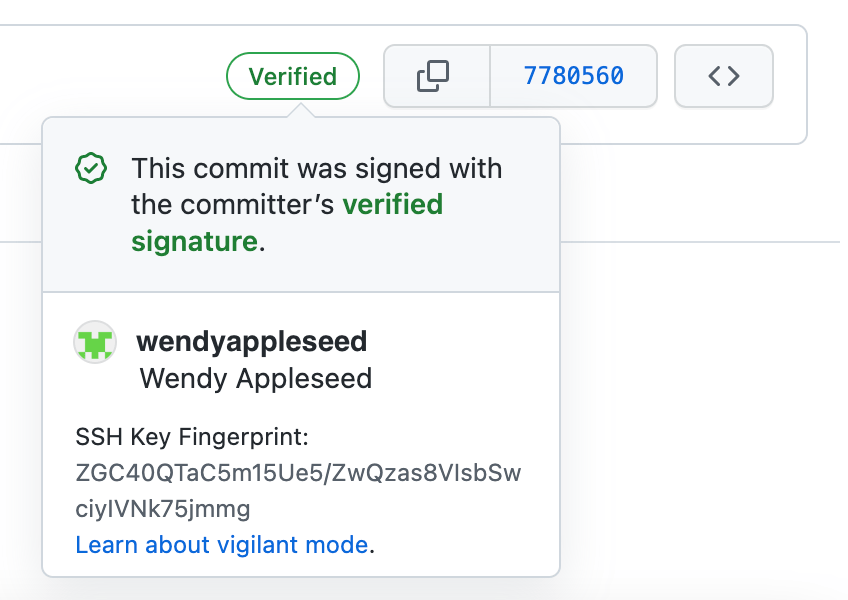
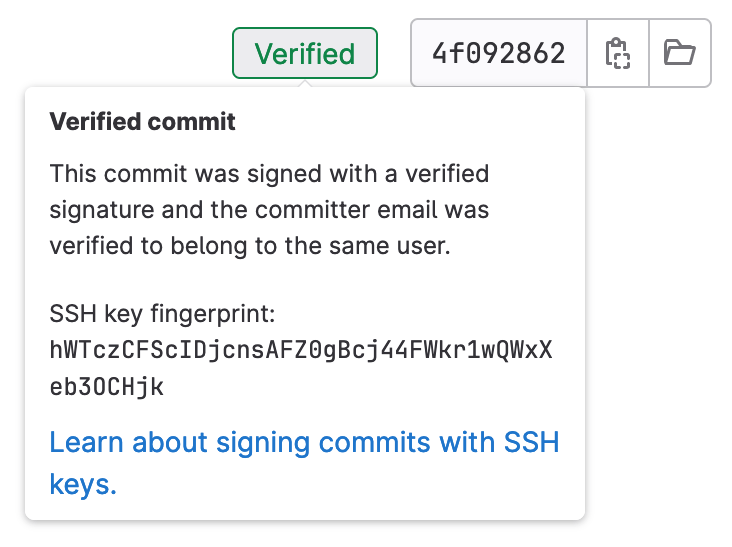
If you look at your commit history on GitHub, you should see the Verified badge show up on your SSH-signed commits. If you select it, you can see the SSH key used to sign it.
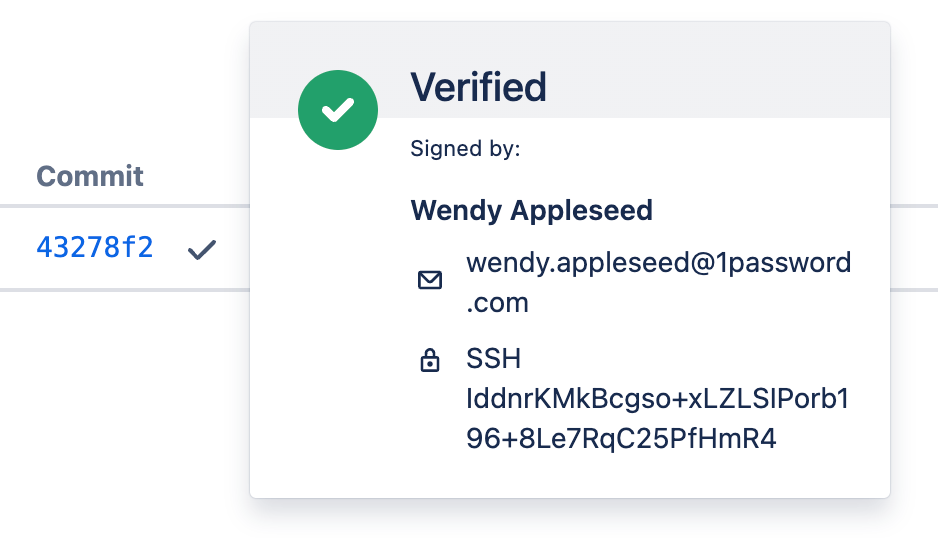
If you look at your commit history on GitLab, you should see the Verified badge show up on your SSH-signed commits. If you select it, you can see the SSH key used to sign it.
If you look at your commit history on Bitbucket, you should see a verified checkmark show up on your SSH-signed commits. If you select it, you can see the SSH key used to sign it.
To verify commits locally, run the following command:
Advanced configuration
Configure commit signing in a single repository
You can enable Git commit signing with SSH for specific repositories or directories instead of globally. To do this:
- Open the SSH key you want to use in your 1Password desktop app.
- Select > Configure Commit Signing.
- In the next window, select Copy Snippet.
- Paste the snippet in the repository's
<git-repo>/.git/configfile instead of the global~/.gitconfigfile.
Configure multiple commit signing setups
If you want to configure multiple commit signing setups, you can use the includeIf directive in your ~/.gitconfig.
For example, to use an SSH commit signing setup with 1Password as your default configuration and a non-1Password GPG setup for the /work/acme subdirectory:
~/.gitconfig
~/work/acme/.gitconfig
In this example, every repository under ~/work/acme will use the GPG configuration, while the SSH configuration will be used everywhere else.
Configure commit signing in remote environments
You can set up SSH agent forwarding to authenticate Git requests and sign commits in remote environments, like from a cloud development environment or remote workstation.
Get help
If Git says that SSH is an unsupported format
If you see the following error message, then your Git version may be outdated:
Support for SSH commit signing was added to Git in version 2.34. Run this command to check your Git version:
It's common for operating systems and Git GUI clients to ship with an outdated version of Git out of the box. To install a more up-to-date version, see the Git install docs.
In the case of Git GUI clients, check the app preferences to see if they allow you to change the Git binary to a more up-to-date version.
If your commits fail after you change your Git configuration
If you see one of the following error messages, it's likely related to your user.signingkey value. Make sure that's set to a valid SSH public key.
If your user.signingkey is set correctly in your ~/.gitconfig file, check the value at the repository level by running the following command from your repo's directory:
Example of a correct output:
If the signing key is not the SSH public key you've configured in your ~/.gitconfig, you may have a local override in your repository.
If you see errors related to the allowed signers file
If you see the following error message, make sure you've properly configured your allowed signers file:
This error should not block you from browsing your commit log - it just prevents you from locally verifying the commit authenticity.
If your SSH-signed commit doesn't get verified by Git, GitHub, GitLab, and/or Bitbucket
If you believe you've signed your commits through SSH but they're not showing up as verified, there are a few things that could be happening:
Commit author email mismatch
Commit signatures will only show up as verified if the registered public key matches the commit author email. Make sure it matches the email you've registered on GitHub , GitLab , or Bitbucket in your allowed signers file.
If your signed commits are verified locally but aren't verified on GitLab.com or Bitbucket, check for any case mismatches in your email address.
For example, if the email address in your GitLab or Bitbucket account is wendy@appleseed.com but your ~/.gitconfig file uses Wendy@appleseed.com, your commits will show as unverified in those accounts.
If you have the correct email in your ~/.gitconfig, check that the settings have correctly propagated down to the repository level as well. To validate this, run the following command from your repo's directory:
If this is not the email you've configured in your ~/.gitconfig, you may have a local override in your repository.
Misconfigured public key
On GitHub, visit the SSH key settings and check that the key you've locally configured as user.signingkey shows up under "Signing keys".
On GitLab, visit the SSH key settings and check that the key you've locally configured as user.signingkey shows up under "Your SSH keys".
On Bitbucket, visit the SSH key settings and check that the key you've locally configured as user.signingkey shows up under "SSH keys".
For a local allowed signers file, make sure your public key is present and matches your email.
Unsupported Git client
Most Git clients support SSH commit signing out of the box, but there are a few exceptions. Even though you may have configured Git correctly, a Git client that doesn't support SSH commit signing will leave your commit unsigned.
Make sure to also check that you're on the latest version of your Git client.
Local Git overrides
Even though you may have configured your ~/.gitconfig well, make sure to also check that the settings have correctly propagated down to the repository level.
To validate this, run the following command from your repo's directory:
Example of a correct output:
If this output does not match up with what you've configured in your ~/.gitconfig, unset the local values:
If you still end up with the wrong value somewhere, you can check where it originates from using the --show-origin flag: